Making of: a GPS app
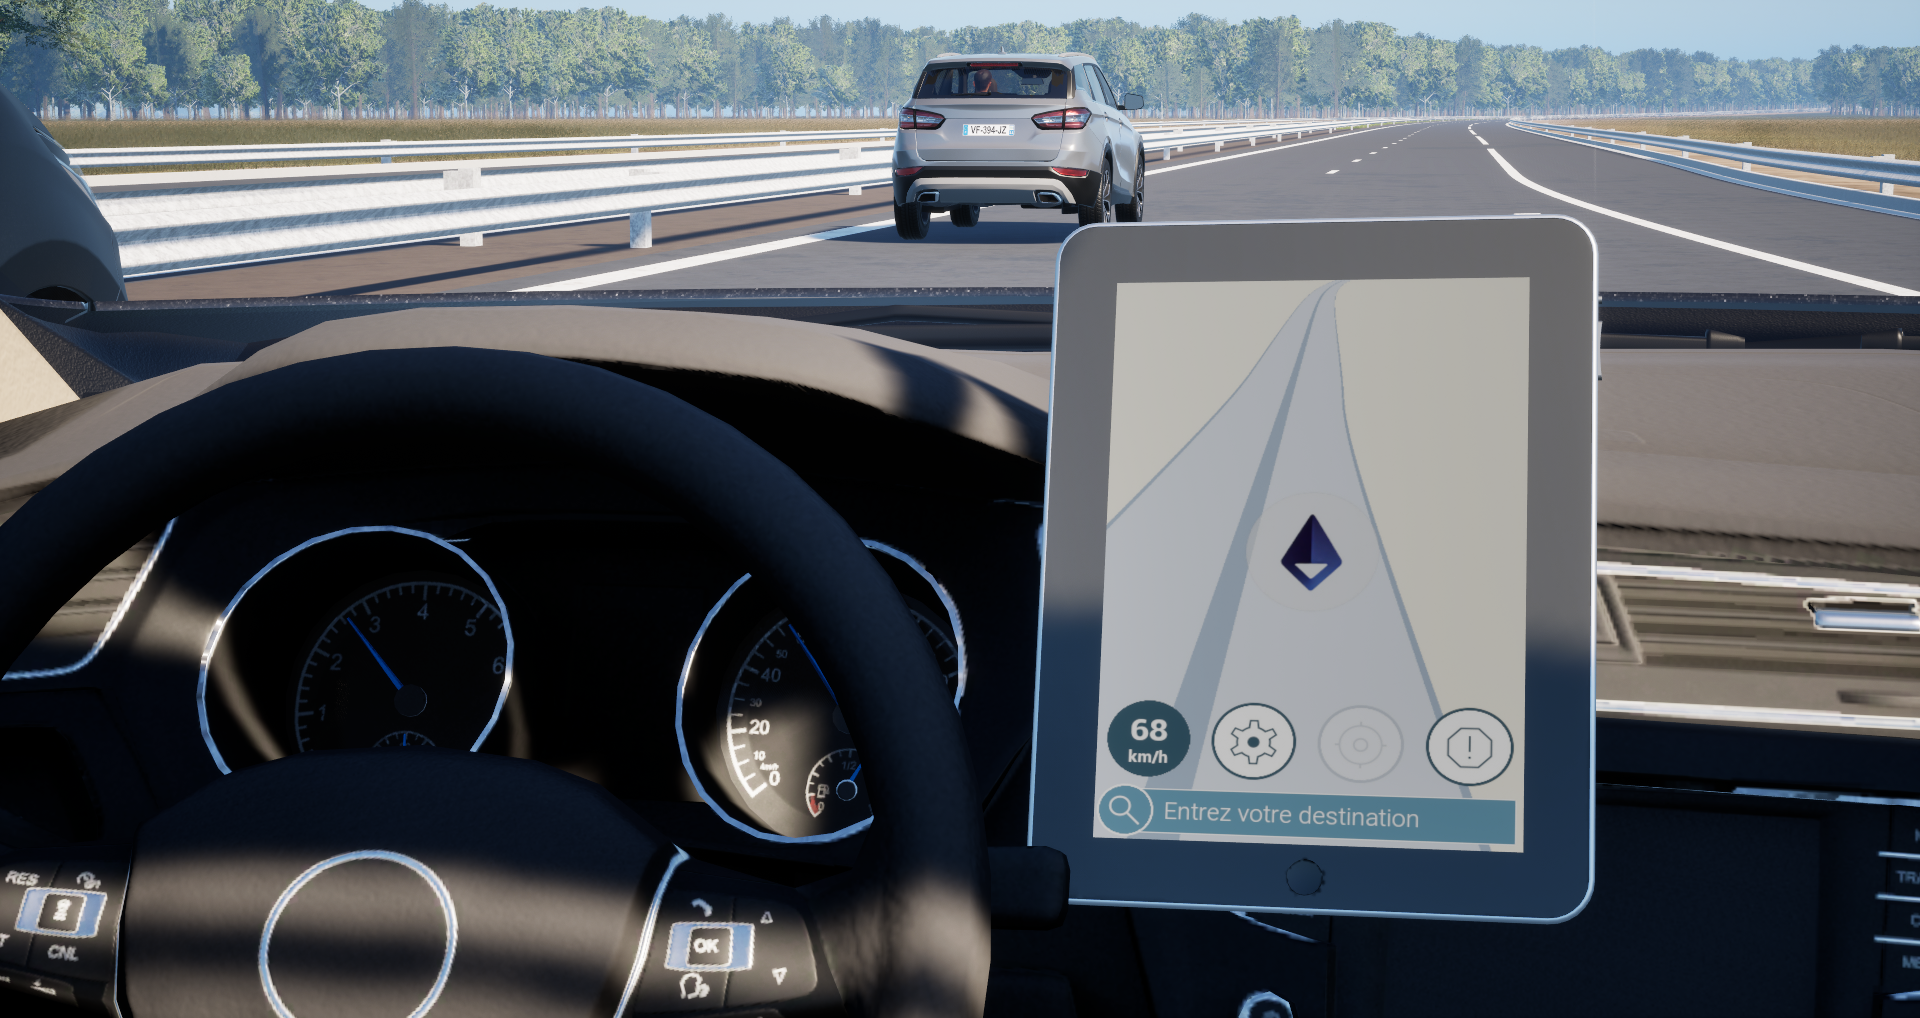
For a research project, we’ve made a fairly realistic GPS app to be used in a full-size driving simulator. It was all done within Unreal, so let’s explore how we did that.
Core ideas and principle
Our project involved a real-world navigation app called Coopits, and the goal was to mock it in a driving simulator, to then be used by participants in a research experiment.
On the graphic design side of things, we could use the existing app as reference, which was great. And on the functional side, we only needed to support specific use cases that would be studied within the project.
Within Unreal, the mock app is built using UMG. I really like this framework, it’s easy to work with, and iterations are super fast. We made around a dozen widgets for this app, which are all very basic (nothing fancy going on here).
Roads and Background
The main view is an alternative capture of the actual simulation scene. We use a simple Scene Capture 2D (which apparently aren’t mentioned in Unreal’s documentation; shocking I know) attached to our Ego vehicle.
The background is just a huge sphere with an unlit material. All materials within the app are unlit, because we obviously don’t want to catch the daylight or any light for that matter.
The app road mesh is automatically duplicated from the actual road mesh. And since RoadRunner does a pretty good job with material slots, we can just swap them out on the fly, replacing them with solid colors. Markings are given the same material as asphalt, but if we wanted to be fancy, we could display those on the app.
Both meshes are obviously marked as Only visible in scene capture, as we don’t want to see them in the main world.
Mirrors
Did I mention that I hate mirrors? Oh yeah, I did.
Well, in this case they add a bit of complexity, as they’re also Scene Captures. Since the fake road/ground meshes are visible only in scene captures for the app, well that makes them also visible in the mirrors, which we definitely don’t want. Thankfully, you can exclude specific actors and components from any scene capture, so everytime we make something visible in the app, we make sure to exclude it from the mirrors.
Vehicle Icons
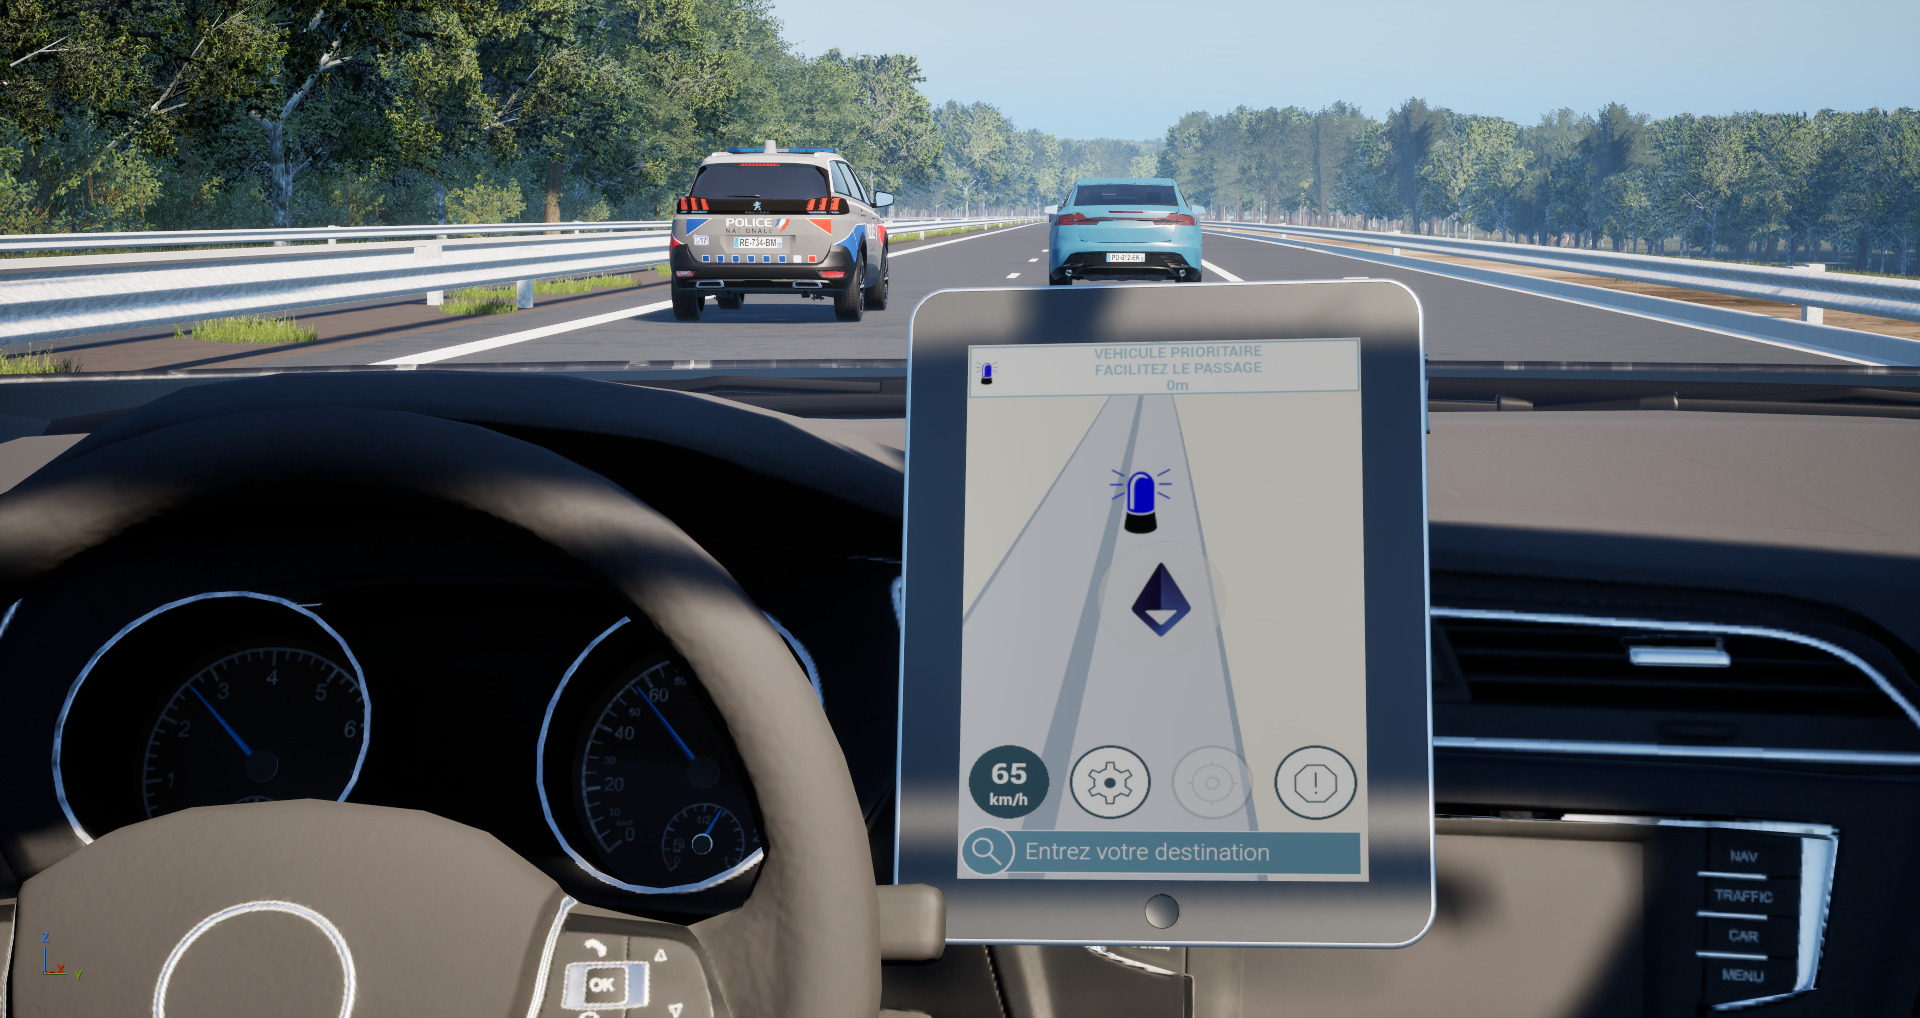
We needed icons for the Ego vehicle, but also for other events along the road. At first we used Billboard components, which seemed ideal. However, they’re not: if you place them at the road level, they’ll clip through it and the icons will be partially hidden on the display. And if you try to be tricky and place them higher over the road, then it creates nasty offset when projected on the scene capture.
So we switched to Material Billboard, using a Translucent Material, which has the really nice option to Disable Depth Test, and always draw on top. Problem solved!
Camera Movement
As with real navigation apps, our camera properties (e.g., location, field of view) change depending on Ego speed, and maybe also other events.
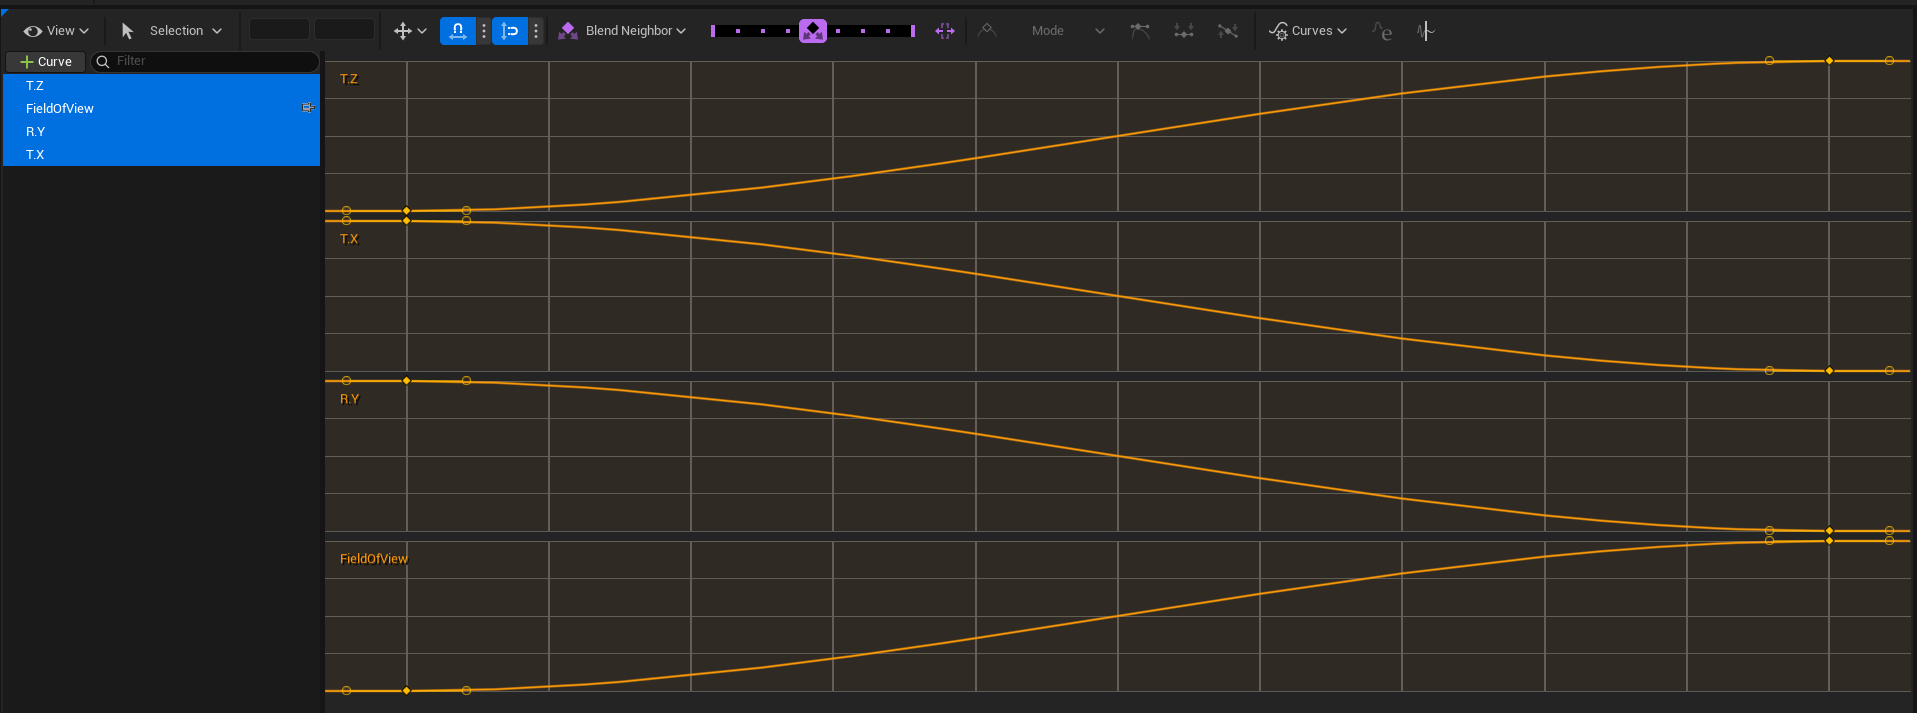
To emulate that, we use Curve Tables, with speed on the X-axis, and pretty much whatever we want on the Y-axis. As you can see, they’re now exactly fancy curves, but it’s definitely the right tool for the job: create your variable, draw curves, connect into Blueprint and done!
Widgets & Notifications
Beyond the scene view, the app has some other widgets, to display things like speed, settings, or a search bar. For most icons, we use the GoIcons plugin, which imports Google Icons into Unreal.
The app also has a notification system, which actually is an integral part of our experiment. It includes multiple modalities: text, side icon, viewport icon, sound, etc. Which is a perfect use case for Data Assets: we just define all our notifications as Data Assets, and then pass them around during the simulation.
In-car display
Now that our app has all the features we need, the last step is to actually show it to the driver. During development, we just draw the widget on our debug HUD. But we need something better for the actual experiment.
Standalone
Before getting in the simulator, let’s first consider our nightly renders. Those don’t render any HUD, so we need to display the app inside the car.
To do that, I used a tablet from a Fab pack, on which I added a material slot for the screen, using Unreal’s built-in Modeling Tools (they’re really good for that kind of things). Then I used a Widget Component, which allows the widget to be drawn on a render target. That texture is then forwarded to the tablet’s dynamic material instance, and voila!
The widget component has two important checkboxes here:
- Render in Main Pass, which needs to be unchecked. By default the component draws the widget in 3D space, which is not what we want here (we just want the render target).
- Tick when Offscreen, which needs to be checked. It makes sure the UI updates even if the widget isn’t visible in the main world.
nDisplay
The resulting experiment runs on our main simulator, where the goal is to have the app displayed on the car’s in-vehicle infotainment (IVI) screen. In our case, that display has been swapped to a standard computer touchscreen.
That monitor is connected to one computer within our nDisplay cluster, so the only thing we have to do to get the app running is to check the current NodeID. If it matches the node currently connected to the IVI, we create the UI. If it matches the master node (which we use as a debug view), we add the UI to the main debug HUD, so that the experimenter can still have visual feedback on the app. And for all other nodes, we just ignore the app altogether.
End result
The video above shows the final version, live on our simulator. By that time we had decided to switch the layout from portait to landscape, which was rather simple since UMG has everything needed to handle that.
Overall this little app was really fun to develop, and everyone involved in the project is very happy with the result. It was our first time using Unreal for in-vehicle display, but it certainly won’t be the last. Having the same tool powering every display makes everything easier, and Unreal being used to create real cars’ HMIs is a good sign that it’s the right tool for this job.